4-2-3-1 DM
Control Intermediate Mid block
4-2-3-1 DM — The Control Room
A patient 4-2-3-1 that keeps a secure base, attacks the half-spaces and asks the No.10 to decide where the game breaks.
Four formation blueprints built for FM27’s new Tactical Effectiveness and Tactical Complexity systems. Find a structure that fits your players — then teach it properly.
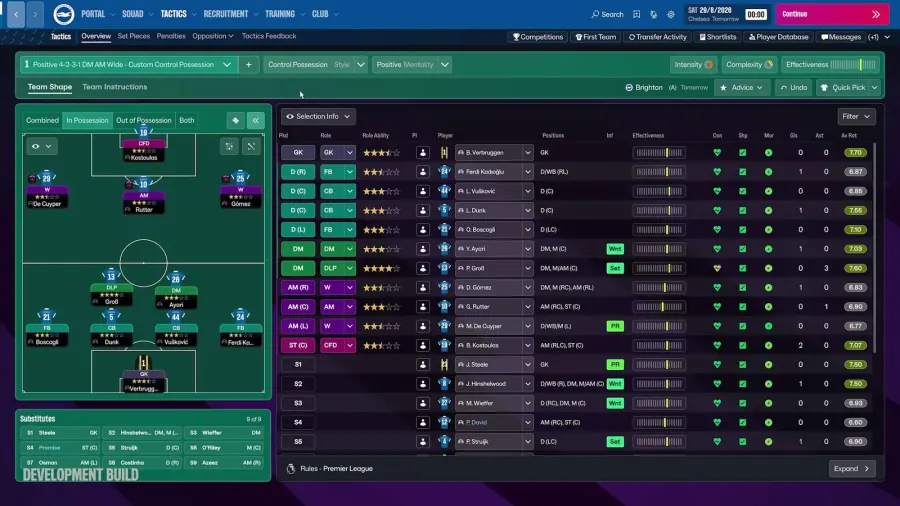
A patient 4-2-3-1 that keeps a secure base, attacks the half-spaces and asks the No.10 to decide where the game breaks.
Aggressive, compact and built to win the ball high — as long as the holding midfielder stays connected to the back four.
A back-three possession shape that creates a 2v1 on the flank, then attacks the box with two inside forwards and a striker.
A low-risk underdog setup that protects the 18-yard box, denies central space and turns clearances into two-man counter-attacks.
No match
Reset the search or choose “All” to see every FM27 blueprint.
A tactic is a set of promises: this is where we stand, this is who attacks, this is how we defend a transition. FM27 makes those promises more visible through Tactical Effectiveness. The best tactic for your save is not necessarily the most aggressive or the most popular one. It is the one your players can perform repeatedly.
If you have two excellent central midfielders, a double pivot or 4-3-3 may get more from the squad than a shape that asks them to cover the whole pitch alone. If your best players are wingers, build the attack around isolating them. If your centre-backs are slow, do not ask them to defend a high line without protection.
A detailed press is not automatically better. FM27’s Tactical Complexity measures the instruction load, and lower-league or newly assembled squads may need time before they can execute it. Start with a clear base, then add instructions only when the team shows it can handle them.
Three matches is not enough to judge a new system. Watch the shape without the ball, the quality of the chances you create and the individual errors. Change one variable at a time. Our effectiveness guide explains how to read the feedback.
| Shape | Best for | Main strength | Main risk |
|---|---|---|---|
| 4-2-3-1 DM | Controlled, technical squads | Double pivot protects the centre and supports the No.10 | Can become passive if the wide players do not attack the box |
| 4-3-3 DM | Aggressive, athletic squads | High press with a holding midfielder behind the ball | Stamina and defensive line exposed by direct passes |
| 3-4-2-1 | Wing-back-friendly squads | Wide overloads and two creators between the lines | Space behind advanced wing-backs |
| 4-4-2 | Underdogs and direct teams | Compact two banks and a ready-made front two | Can be starved of possession and pinned back |
Set the shape, train the behaviour, read the gauges and only then change the plan.